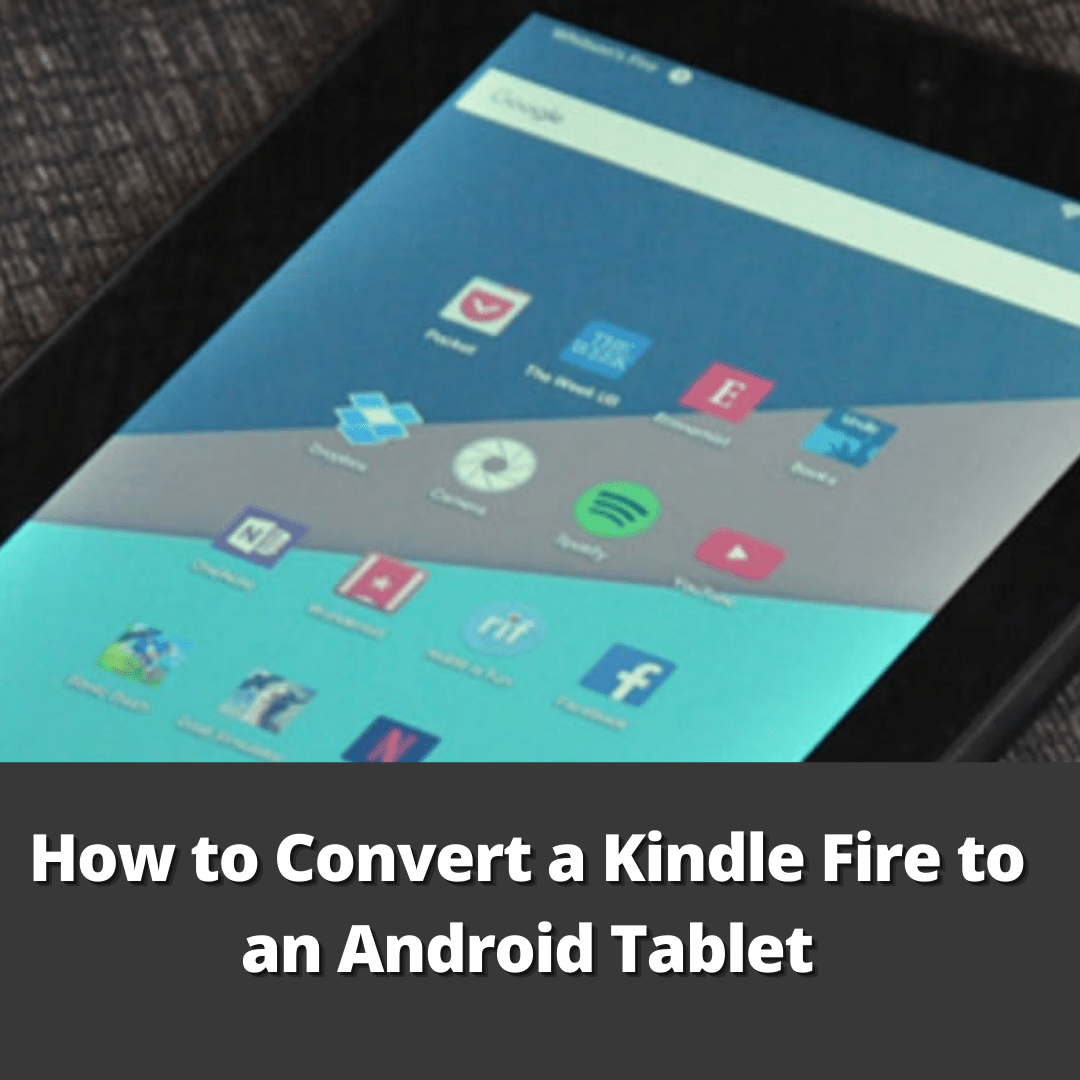
The Kindle Fire is an amazing tablet, but it’s not always the best for everyone. Some people prefer Android tablets because they have a variety of more apps and games to choose from. If you want to convert your Kindle Fire into an Android Tablet, then just follow these simple steps!
– First, go to Settings on your Kindle Fire.
– Next, tap Display and turn off the lock screen orientation so that you can move it from landscape mode (horizontal) to portrait mode (vertical). You’ll see a prompt telling you how hot this will affect battery life. Click Turn Off Screen Lock Orientation if you’re happy with the tradeoff or click Keep Rotation Locked for more security while carrying around your tablet in public places.
– Now just find Device Info in your settings list and tap it. This brings up a detailed overview of all sorts of things about your device! If everything looks good here then head back out to your home screen by tapping Cancel at the bottom right corner of the display (#).
– Next, click on the Apps icon and then find Google Play Store. This is where you’ll be installing all your favorite Android apps! Click on it, enter in your email address to create an account if you don’t have one already, click Accept & download at the bottom right corner of the screen (#) to accept the Terms of Service agreement, and finally tap Install when prompted.
– When installation finishes – Congrats! You’ve turned a Kindle Fire into an Android Tablet with full access to tons of games and other amazing features that come from being connected to Wi-Fi or cellular data networks.
How to Convert a Kindle Fire to an Android Tablet
In this tutorial, we are going to show you how to convert a Kindle Fire to an Android tablet. We will need the following items: – Kindle Fire – Android tablet – OTG cable – USB mouse – Keyboard The first thing we need to do is to make sure that our Kindle Fire is rooted. If it is not, we can follow this tutorial on how to root a Kindle Fire. Once our Kindle Fire is rooted, we need to install the Android tablet emulator, Bluestacks. We can find the download link for Bluestacks here. Once Bluestacks is installed, we need to open it up and sign in with our Google account. Next, we need to download the Google Play Store app. We can find the download link for the Google Play Store app here. Once the Google Play Store app is downloaded, we need to open it up and sign in with our Google account. Now that we have the Google Play Store app installed, we can start downloading our favorite Android apps!
What You’ll Need to Convert a Kindle Fire to an Android Tablet
Your Kindle Fire USB Cable Windows PC or Mac Step 1: Back Up Your Kindle Fire Before you start converting your Kindle Fire to an Android tablet, you’ll want to back up your device in case something goes wrong. To do this, connect your Kindle Fire to your computer using the USB cable and then open up the Kindle Fire folder. Copy the contents of the folder to a safe location on your computer. This will copy all of your Kindle Fire’s data, including your apps, books, and settings. Step 2: Download the Android SDK Next, you’ll need to download the Android SDK. This is the software that will allow you to convert your Kindle Fire to an Android tablet. You can download the Android SDK for free from the Android website. Step 3: Install the Android SDK Once you’ve downloaded the Android SDK, you’ll need to install it on your computer. The installation process is different depending on whether you’re using a Windows PC or a Mac. For Windows PC users: 1. Extract the contents of the Android SDK zip file. 2. Open the SDK folder and double-click on the “SDK Setup.exe” file. 3. Follow the on-screen instructions to install the SDK. For Mac users: 1. Extract the contents of the Android SDK zip file. 2. Open the “android-sdk-mac_x86” folder and double-click on the “android” file. 3. Follow the on-screen instructions to install the SDK. Step 4: Connect Your Kindle Fire to Your Computer Once the Android SDK is installed, you’ll need to connect your Kindle Fire to your computer. For Windows PC users: 1. Plug your Kindle Fire into your computer’s USB port. 2. Open the Kindle Fire folder and double-click on the “android_winusb.inf” file. 3. Windows will automatically install the drivers for your Kindle Fire. For Mac users: 1. Plug your Kindle Fire into your computer’s USB port. 2. Open the “android-sdk-mac_x86” folder and double-click on the “usb_driver” file. 3. Mac will automatically install the drivers for your Kindle Fire. Step 5: Launch the Android SDK Now that your Kindle
How to Install Android on Your Kindle Fire
HD The Kindle Fire is a tablet device that was originally released by Amazon.com in November 2011. The Kindle Fire runs a custom version of Android 2.3 Gingerbread, with a customized user interface and no Google apps. However, due to its popularity, there is a large community of developers who have created custom ROMs and other software modifications that allow the Kindle Fire to be converted into a full-fledged Android tablet. There are a few different methods that can be used to install Android on a Kindle Fire. The most common method is to use a program called “FireFireFire” to create a custom Android ROM that can be installed on the Kindle Fire. This process is a bit technical, and requires some basic knowledge of computer programming and Android development. A simpler method is to use an Android emulator such as BlueStacks or Andy to run Android apps on the Kindle Fire. This method does not require any programming or development skills, and is a good option for people who are not familiar with the technical aspects of Android development. Finally, a third option is to use a custom firmware such as CyanogenMod that already includes Android. This is the easiest method, but it can be more difficult to find compatible firmware for the Kindle Fire. Once Android has been installed on the Kindle Fire, there are a number of things that can be done to improve the user experience. The first thing that should be done is to install a custom launcher such as Nova Launcher or Apex Launcher. These launchers allow for more customization and flexibility than the standard Kindle Fire launcher. Another important thing to do is to install a good keyboard app. The standard Kindle Fire keyboard is not very user-friendly, so it is a good idea to install a keyboard app such as SwiftKey or Swype. Finally, it is also a good idea to install some good root-only apps such as Titanium Backup or Greenify. These apps allow for more control and customization of the Android operating system.
How to Enable Developer Options on Your Kindle Fire
Amazon’s Kindle Fire is a tablet that is popular for its low cost and integration with Amazon’s content ecosystem. While the Kindle Fire is a great tablet, it has some limitations that can be addressed by converting it to an Android tablet. In this article, we will show you how to convert a Kindle Fire to an Android tablet and how to enable developer options on your Kindle Fire. Before we begin, you will need the following items: -A Kindle Fire -A computer with an internet connection -A micro-USB cable -A USB drive -Win32 Disk Imager The first step is to make a backup of your Kindle Fire’s contents. To do this, connect your Kindle Fire to your computer using the micro-USB cable. Next, open up a file explorer window on your computer and locate the Kindle Fire. You should see a folder called “Internal Storage”. Double-click on this folder to open it. You will see a number of folders and files in this folder. To make a backup of your Kindle Fire’s contents, copy all of the folders and files in this folder to your USB drive. The next step is to download and install Win32 Disk Imager. This is a program that will allow us to write the backup of our Kindle Fire’s contents to an Android tablet. After you have downloaded and installed Win32 Disk Imager, open it up. Next, locate the folder on your USB drive that contains the backup of your Kindle Fire’s contents. Select this folder and click on “Open”. Next, select the Android tablet that you want to write the backup to. Make sure that the tablet is connected to your computer using the USB cable. Click on “Write” and wait for the process to finish. After the process is finished, disconnect your Android tablet from your computer and restart it. You should now see the contents of your Kindle Fire’s backup on your Android tablet. The next step is to enable developer options on your Kindle Fire. To do this, open up the Settings app on your Kindle Fire. Next, scroll down and select “More”. Scroll down and select “Developer Options”. The next step is to enable USB debugging. To do this, scroll down and select “USB debugging”. The final step is to connect your Kindle Fire to your computer using the micro-USB cable. Open up a file explorer window on your computer and
How to Install ADB and Fastboot on Your Computer
How to Install TWRP on Your Kindle Fire In this blog post, we’re going to show you how to convert your Kindle Fire into an Android tablet. We’ll also show you how to install ADB and Fastboot on your computer, as well as how to install TWRP on your Kindle Fire. First, we’ll show you how to install ADB and Fastboot on your computer. ADB and Fastboot are necessary for installing TWRP on your Kindle Fire. To install ADB and Fastboot, you’ll need to download the Android SDK from Google’s website. Once you’ve downloaded the Android SDK, extract the files to a folder on your computer. Next, open the folder where you extracted the Android SDK files, and then open the “platform-tools” folder. Inside the “platform-tools” folder, you’ll find the “adb” and “fastboot” files. Copy these files to the folder on your computer where you installed the Android SDK. Now, we’ll show you how to install TWRP on your Kindle Fire. First, download the TWRP recovery image for your device from the TWRP website. Next, extract the files from the TWRP recovery image, and then copy the “twrp.img” file to the “platform-tools” folder on your computer. Now, we’ll show you how to install TWRP on your Kindle Fire. First, power off your Kindle Fire. Next, hold down the “Power” and “Volume Down” buttons on your Kindle Fire, and then press the “Volume Up” button to enter into the Fastboot mode. Next, connect your Kindle Fire to your computer using the USB cable. Now, open a Command Prompt window on your computer, and then type the following command: “adb devices” If your Kindle Fire is connected to your computer, you’ll see a list of devices connected to your computer. Next, type the following command to install TWRP on your Kindle Fire: “adb sideload twrp.img” Once the TWRP recovery image has been sideloaded to your Kindle Fire, you’ll be able to boot into TWRP by holding down the “Power” and “Volume Down” buttons on your Kindle Fire, and then pressing the “Volume Up” button.
How to Connect Your Kindle Fire to Your Computer
How to Connect Your Kindle to the Internet In this day and age, Kindles have become a popular alternative to physical books. Amazon Kindle Fire is a tablet device that allows users to read books, magazines, newspapers, and other digital content. Kindle Fire also lets users access the internet, make phone calls, listen to music, watch movies, and play games. The Kindle Fire comes with a 7 inch multi-touch screen, Wi-Fi connectivity, 8 GB of internal storage, and a 1.2 GHz dual-core processor. The device runs on the Android operating system and has access to the Amazon Appstore, which offers over 500,000 apps, games, and other digital content. Kindle Fire also comes with a built-in camera and a 2.0 megapixel rear-facing camera. The Kindle Fire is a great device for reading, but it can also be used for other purposes. In this article, we will show you how to convert your Kindle Fire to an Android tablet and how to connect your Kindle Fire to your computer and the internet. CONVERTING KINDLE FIRE TO AN ANDROID TABLET If you want to use your Kindle Fire for other purposes, such as accessing the internet, making phone calls, and watching movies, you can convert your Kindle Fire to an Android tablet. This can be done by installing the Android operating system on your Kindle Fire. The Android operating system is an open source operating system that is used on a variety of devices, including smartphones, tablets, and laptops. The Android operating system is a popular choice because it offers a wide range of features and it is customizable. There are a few ways that you can install the Android operating system on your Kindle Fire. One way is to use a tool called “EZFire”. EzFire is a program that allows you to install the Android operating system on your Kindle Fire. EzFire is available for Windows, Mac, and Linux computers. Another way to install the Android operating system on your Kindle Fire is to use a program called “KingoRoot”. KingoRoot is a program that allows you to install the Android operating system on your Kindle Fire using a computer. KingoRoot is available for Windows, Mac, and Linux computers. Once you have installed the Android operating system on your Kindle Fire, you will be able
How to Copy Your Kindle Fire’s Contents to a New Android Tablet
If you have a Kindle Fire and would like to convert it to an Android tablet, there are a few ways to do this. The first way is to completely erase your Kindle Fire and then set up your Android tablet as a new device. The second way is to copy your Kindle Fire’s contents to your Android tablet. This guide will show you how to do the latter. To copy your Kindle Fire’s contents to your Android tablet, you will need: An Android tablet A USB cable Your Kindle Fire Your Android tablet must be running Android 4.0 or higher. 1. Connect your Android tablet to your computer using the USB cable. 2. On your Android tablet, open the “Notifications” panel. 3. Tap the “USB connected” notification. 4. Tap “Mount.” 5. On your computer, open the “This PC” folder. 6. Double-click the “Android” folder. 7. Double-click the “Device” folder. 8. Double-click the “Internal Storage” folder. 9. Double-click the “Books” folder. 10. Copy the contents of your Kindle Fire’s “Books” folder to your Android tablet’s “Books” folder. 11. Copy the contents of your Kindle Fire’s “Documents” folder to your Android tablet’s “Documents” folder. 12. Copy the contents of your Kindle Fire’s “Pictures” folder to your Android tablet’s “Pictures” folder. 13. Copy the contents of your Kindle Fire’s “Music” folder to your Android tablet’s “Music” folder. 14. Copy the contents of your Kindle Fire’s “Movies” folder to your Android tablet’s “Movies” folder. 15. Copy the contents of your Kindle Fire’s “TV Shows” folder to your Android tablet’s “TV Shows” folder. 16. Disconnect your Android tablet from your computer. 17. On your Android tablet, open the “Settings” app. 18. Tap “Storage.” 19. Tap “Books.” 20. Tap “OK.” 21. Tap “Documents.” 22. Tap “OK.” 23. Tap “Pictures.” 24. Tap “OK.” 25. Tap